Build Your First AnyDB Connected System
Follow these steps to create a simple system in 10 minutes.
AnyDB allows you to build flexible but connected operational systems for your business.
In this guide, you will create a simple system with Customers and their Orders.
So we will only create two AnyDB types to match to customers and orders.
- Create an Order type with order details.
- Create a Customer type that can hold related Orders.
- Create a customer record and then add orders to the Customer.
- Optionally calculate the total order amount for a customer with a formula.
Step 1: Create an Order Type
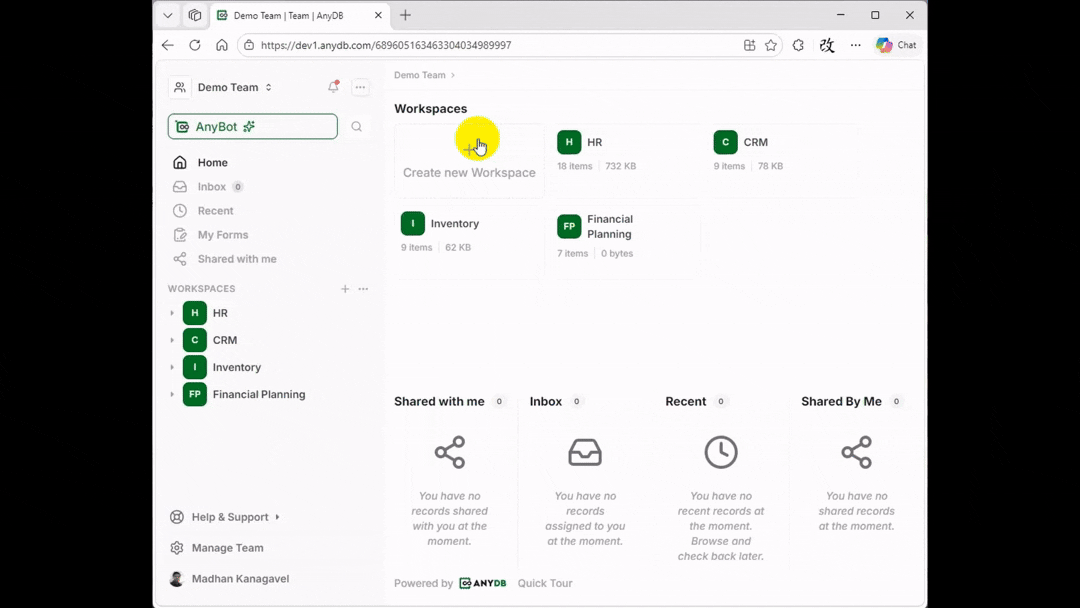
Create a new Workspace or open existing and click on New Type and select "Build from Scratch"
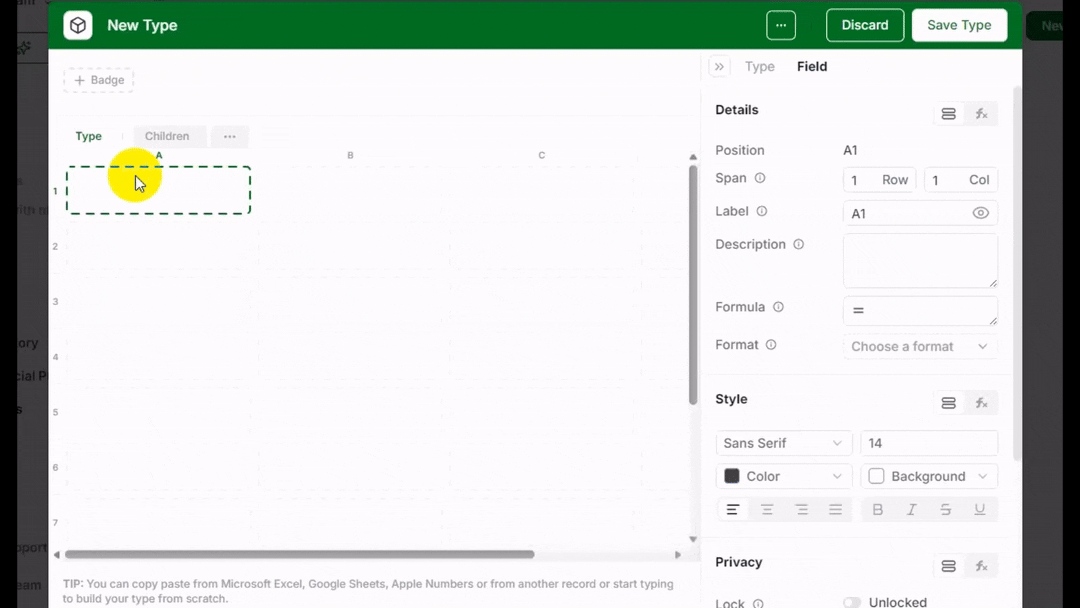
This is the AnyDB Object type designer. In this design, design your type and layout. The type designer looks like a spreadsheet with rows and columns.
Simply click on a cell and then type in the field name as label and select type of the cell.

Set cell Format to "Single line text".
Click on the next cell and add an Amount and set the cell format to "Currency".
Save the type as Order.
Step 2: Create a Customer Type
Create another type called Customer

- Add a field Name
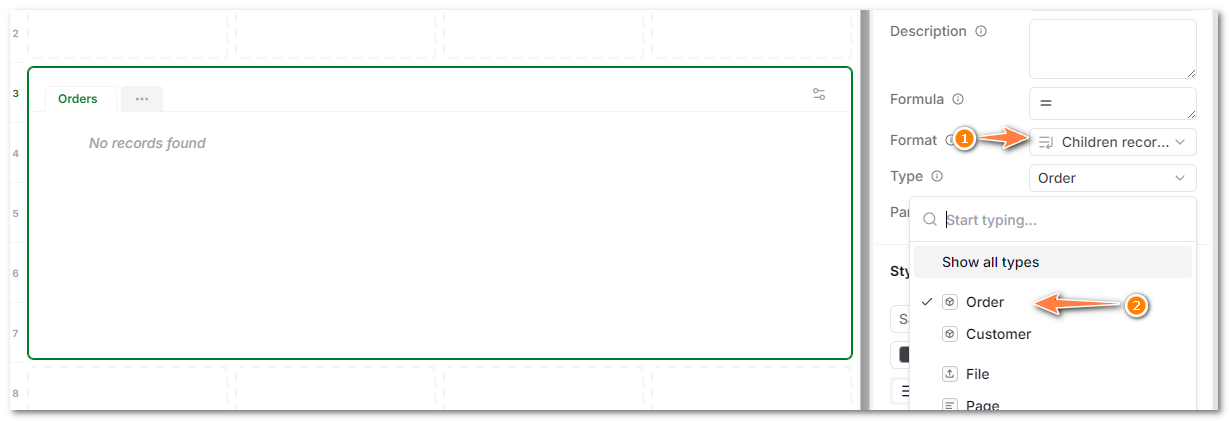
- Add a section to store related Orders:
- Add a Children Records cell.
- Set the child record type to Order.
Save the type as Customer.
Step 3: Create a Customer and Add Orders
- Open the Customer type.
- Create a new Customer Record
- Inside the Customer Orders Section
- Click Add Order.
- Create a new order

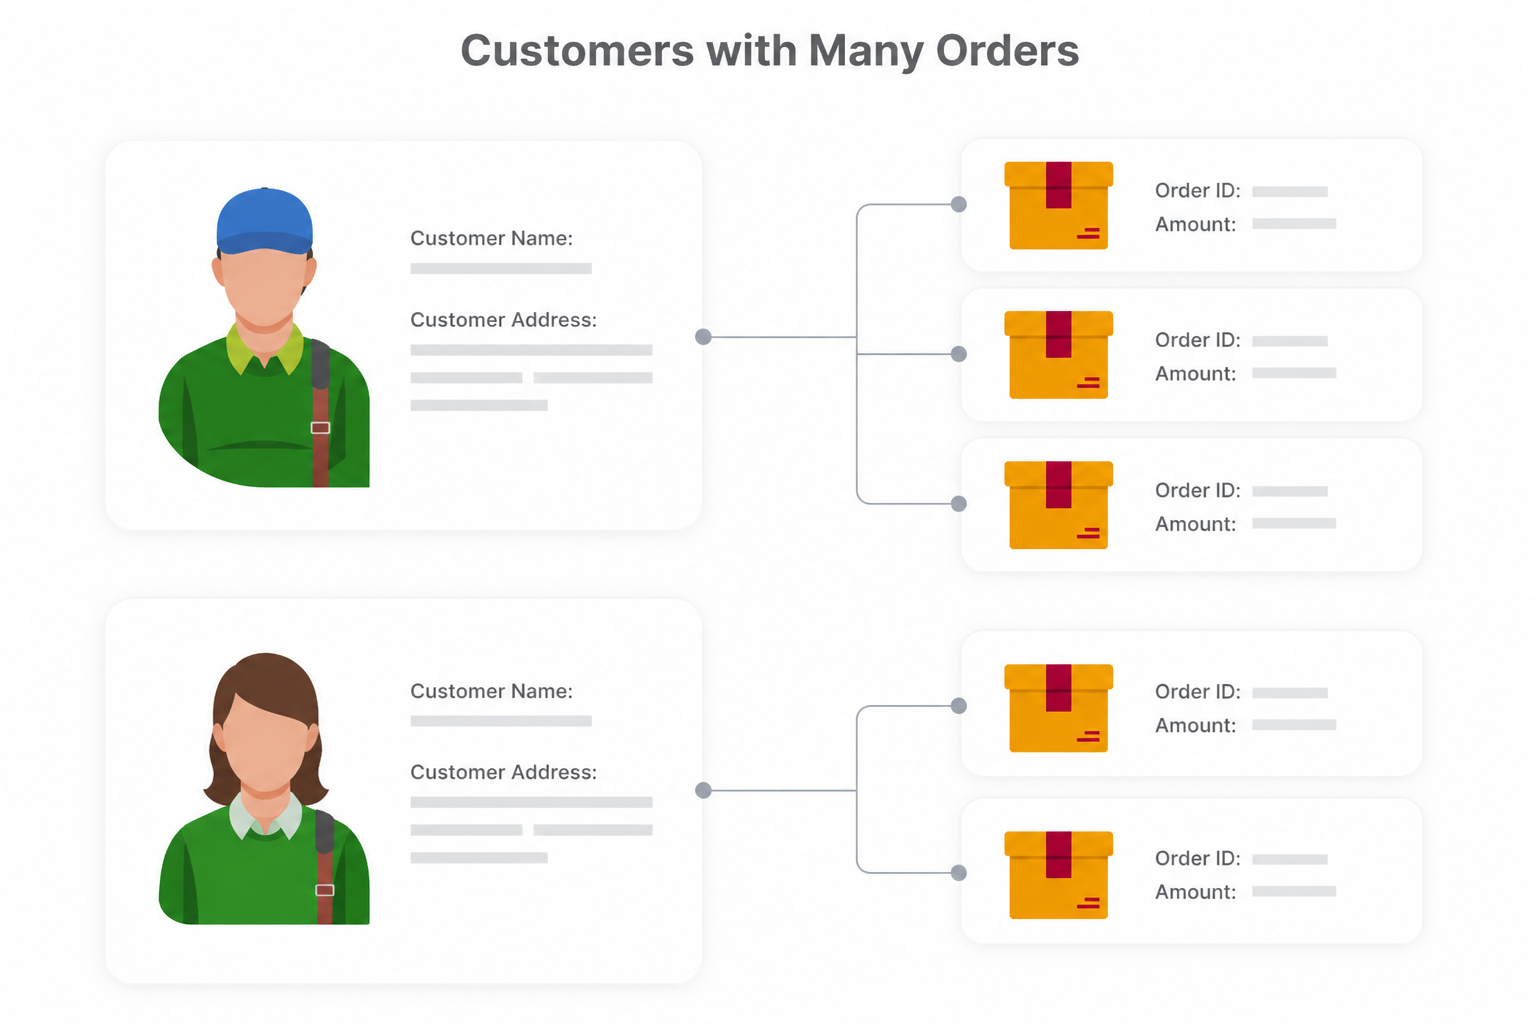
You now have a Customer with related Orders.
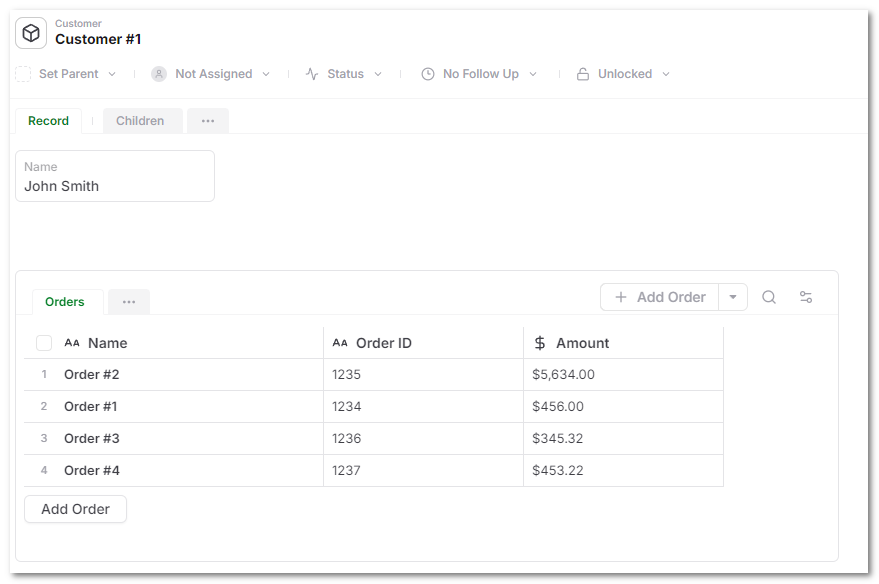
You’ve just created connected records in AnyDB.
Optional Next Step: Show Total Order Amount
Once you have connected records, we can show total of orders for a customer.

Edit the Customer type:
- Add Total Amount
- Set this formula
SUM(C@CURRREC!{{Amount}})to sum of the field{{Amount}}from all child records - Now you can add more orders and the total amount will update immediately.
What can you do from here?
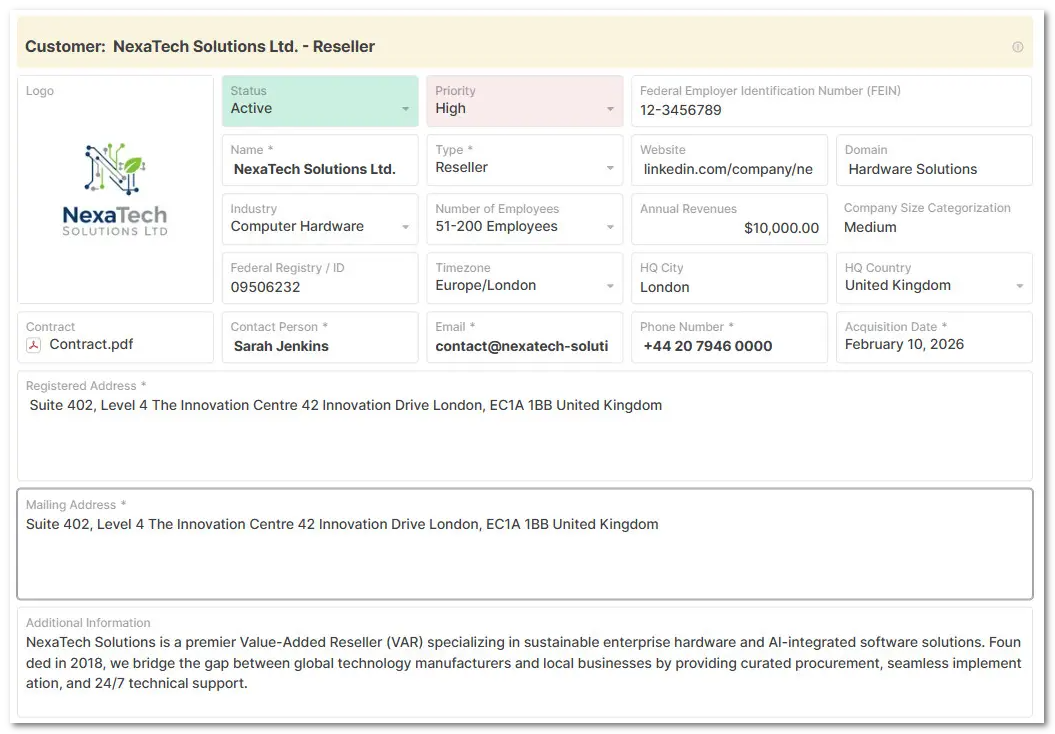
While this showed a simple example, you can build full-fledged systems quickly. Here's an example below:
There are 100s of existing AnyDB Types you can use directly or edit.
There are also full-fledged solutions for inventory, asset, O2C, and more available ready to use.
Don't want to build this yourself?
- Our new AnyBot AI agent can build a operational system from a quick prompt
- Contact us. We or our partners can help you build the custom operational system you need.